STM32 Quick Start
Introduction
This tutorial helps you understand the STM32 environment setup, program compilation, and deployment.
Software Preparation
Install the following software, which is required for this tutorial.
-
A code generator provided by ST to create initial projects and configurations for STM32.
-
Provides tools needed for STM32 project development.
-
An essential editor for programmers, particularly suitable for coding.
Hardware Preparation
-
STM32 Development Board
Any development board with an STM32 chip will do. This tutorial uses the affordable
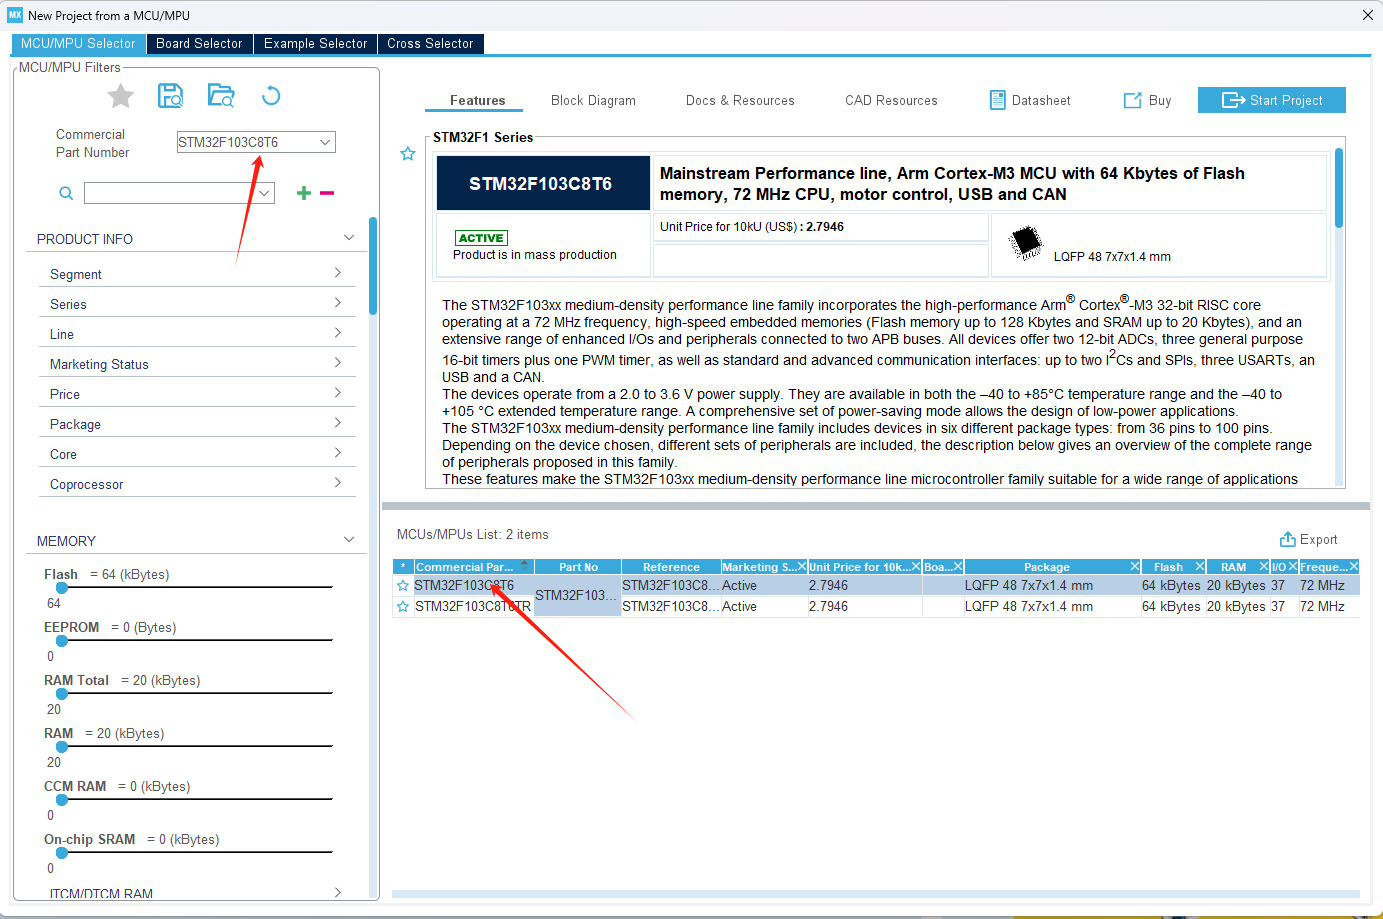
STM32F103C8T6core board.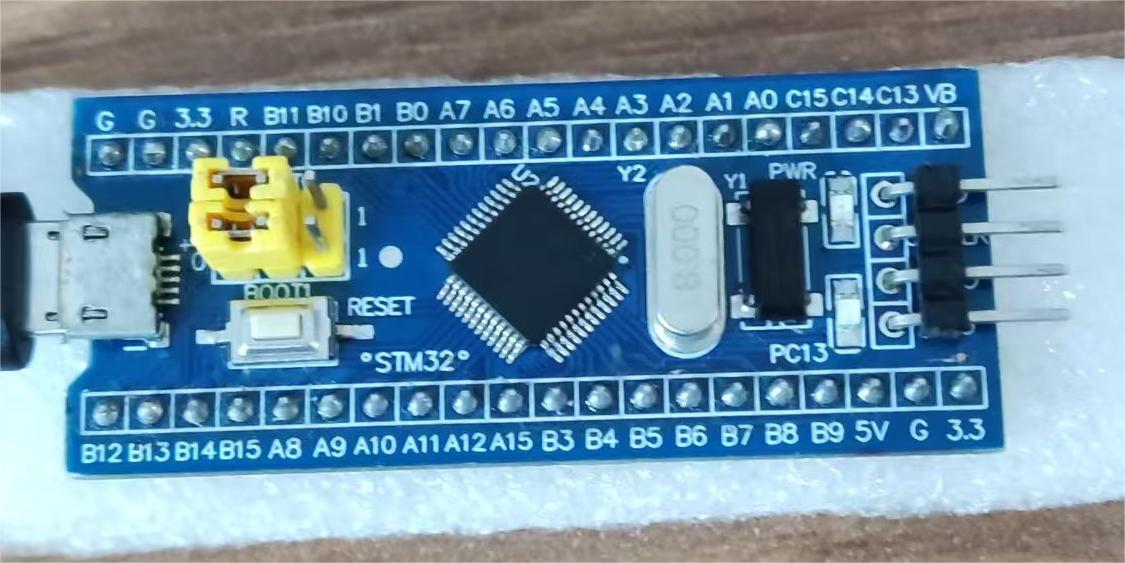
-
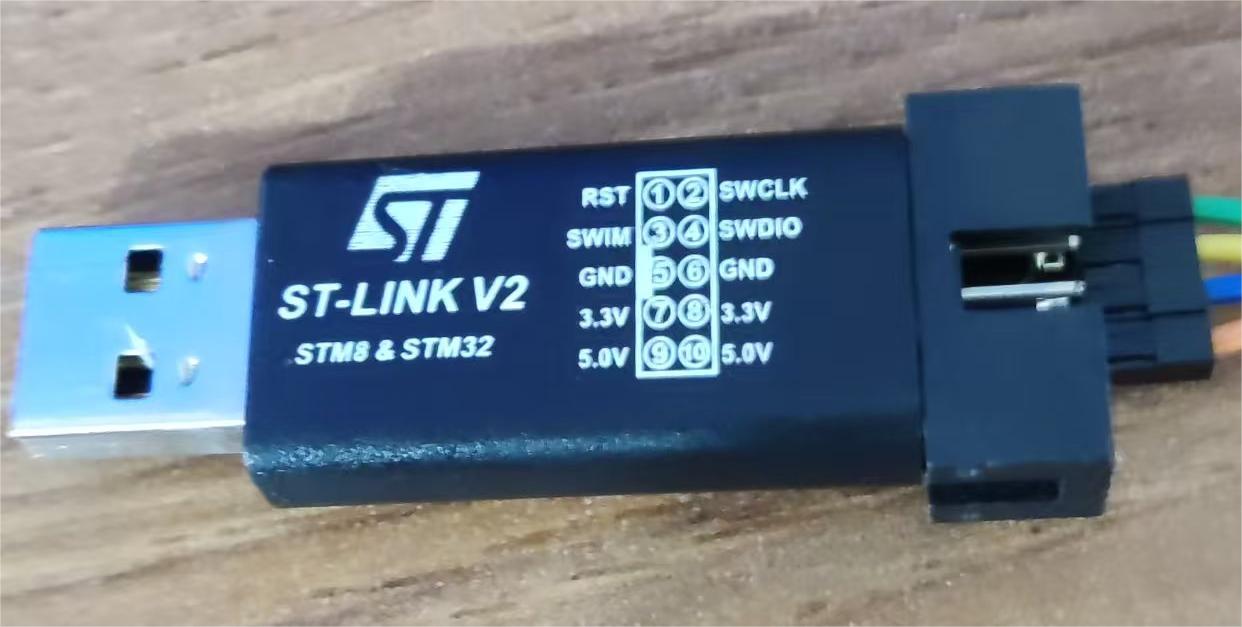
ST-Link Downloader
This tutorial uses ST-Link for program downloading and does not cover other download methods.
Creating a New Project
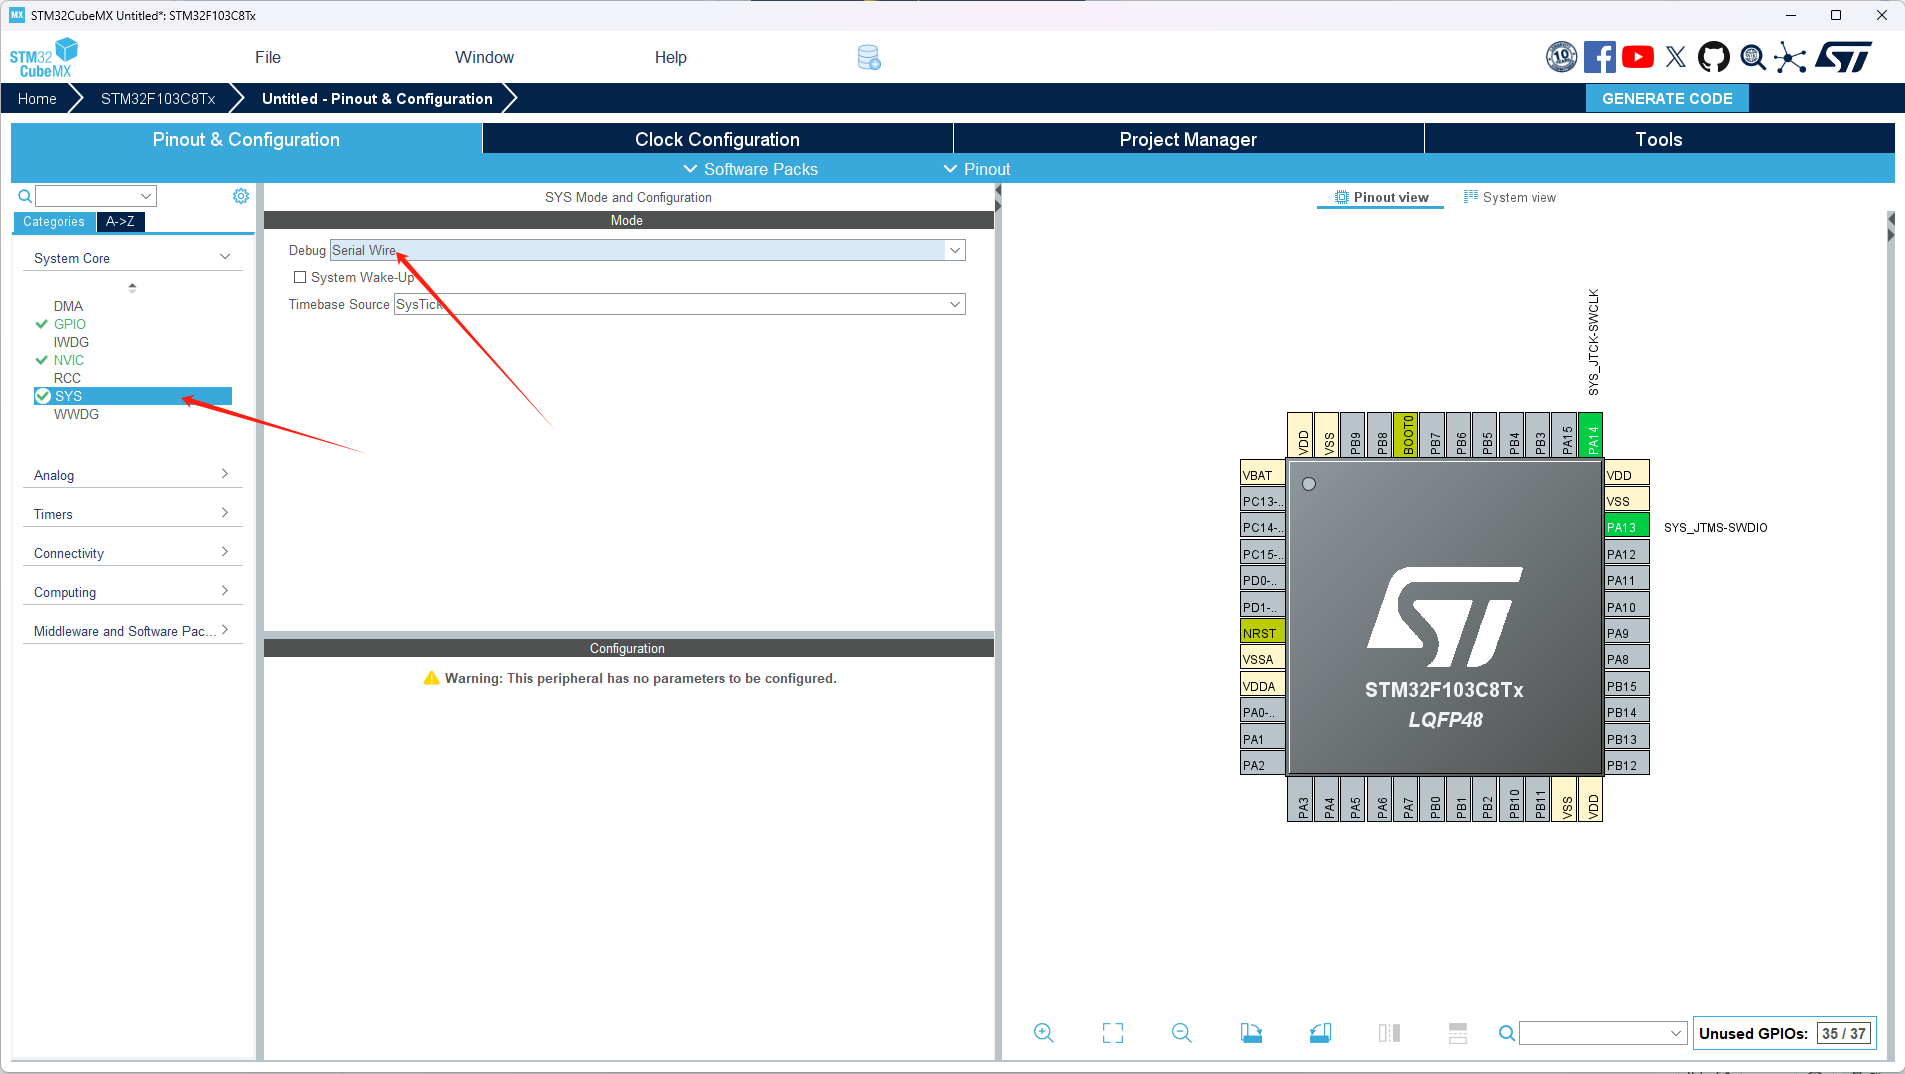
Launch STM32CubeMX
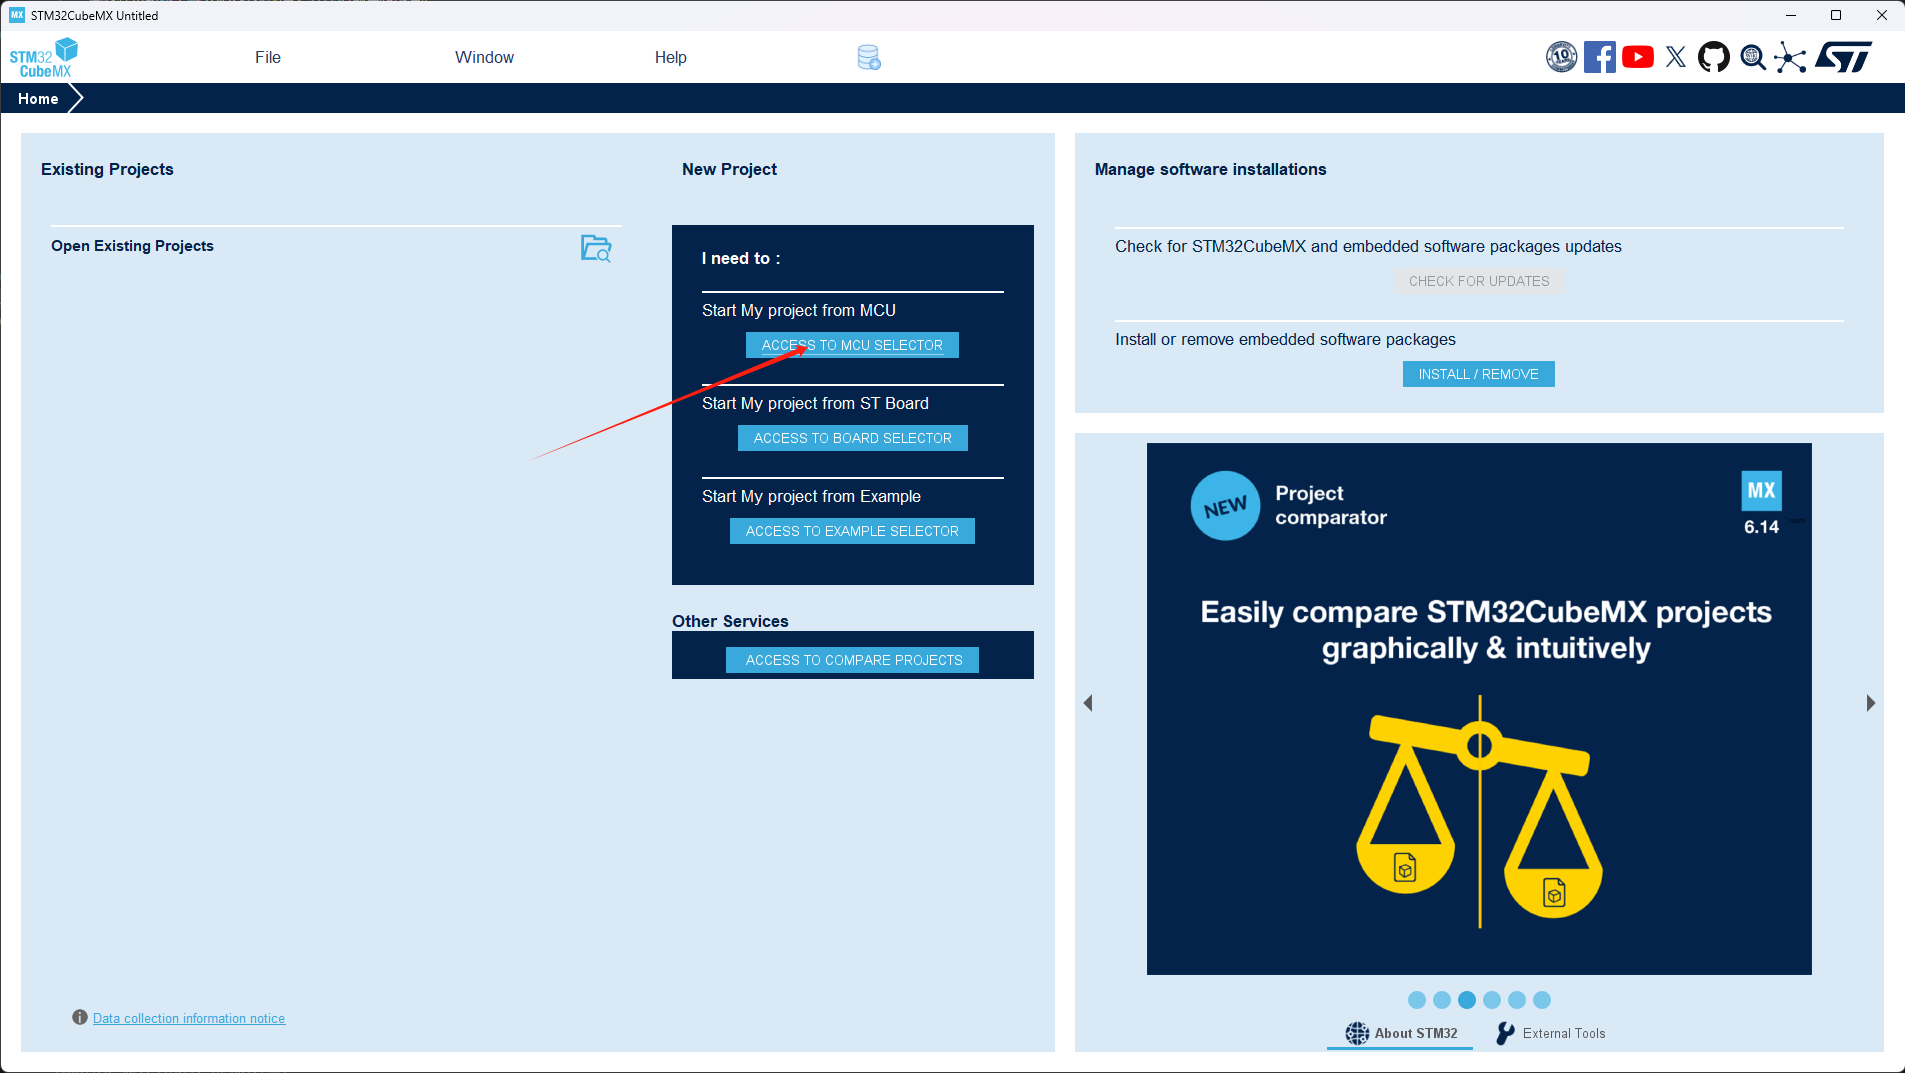
Select Chip
Configure SWD
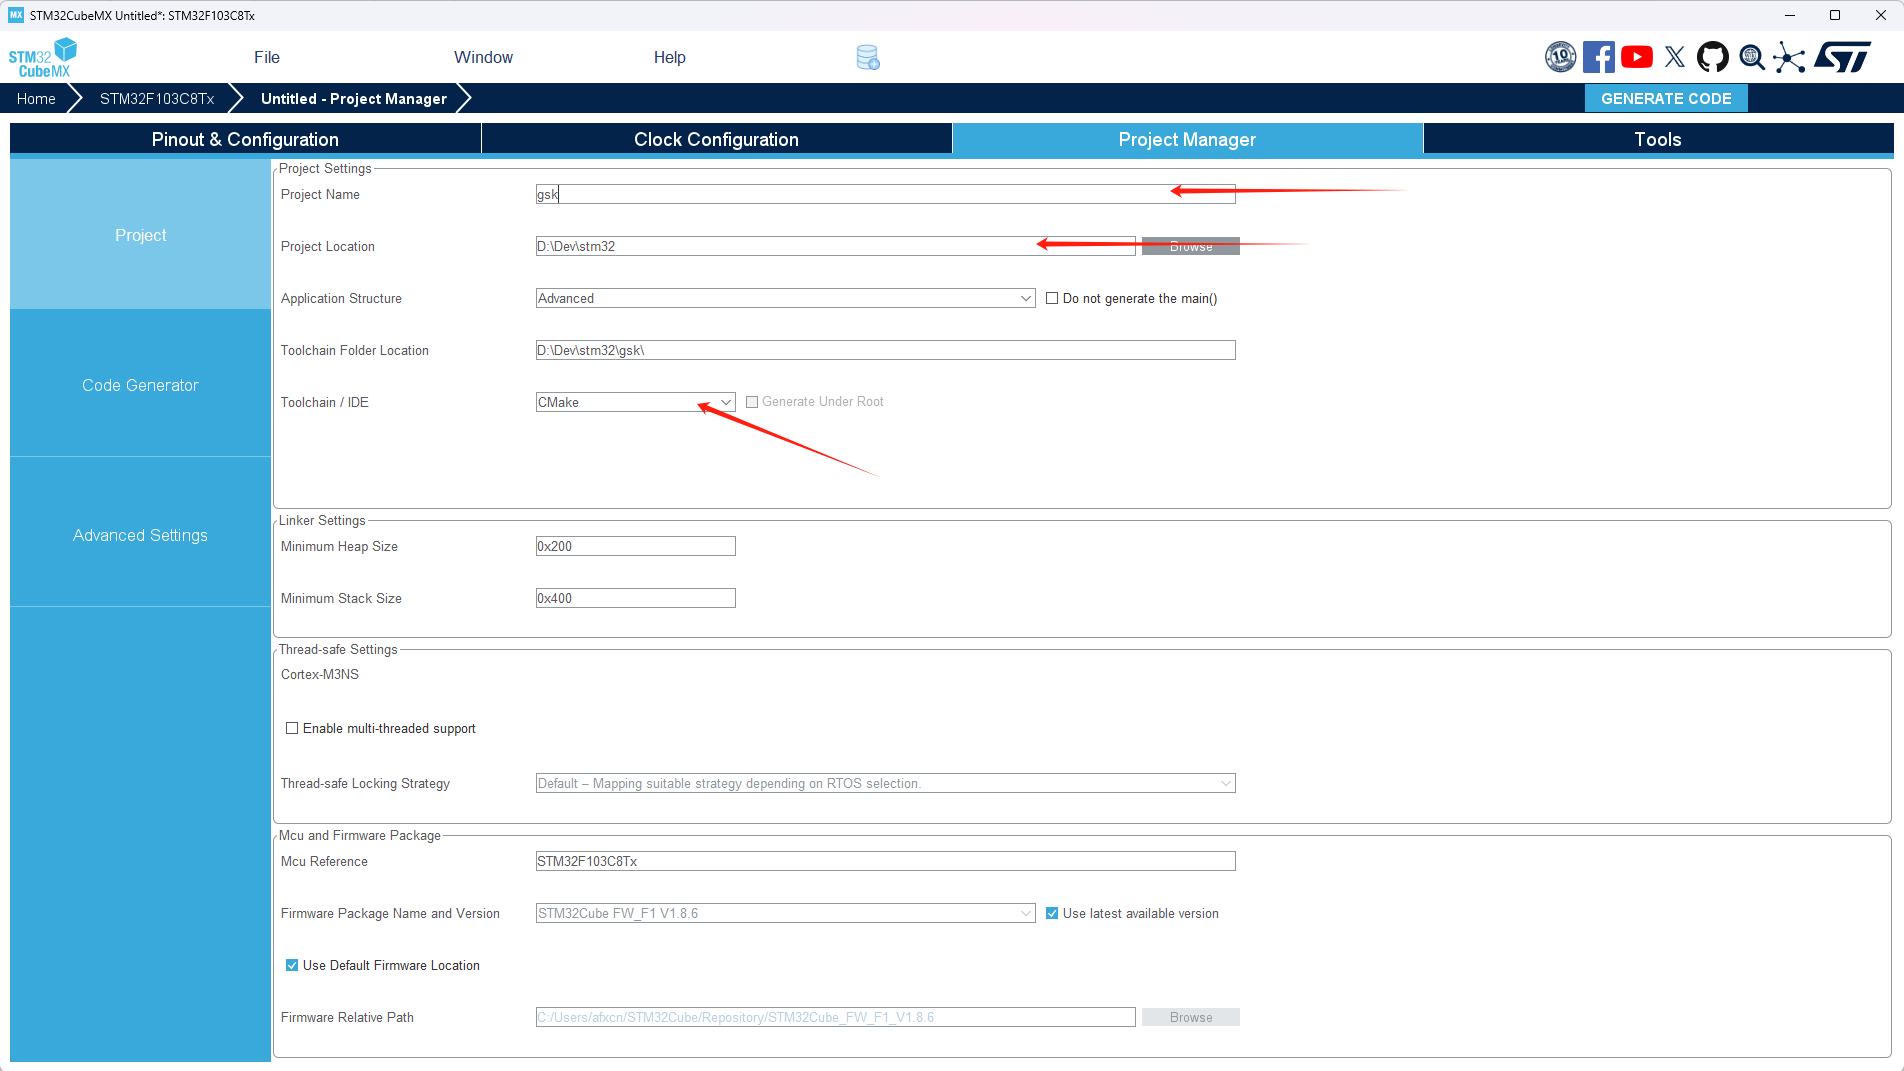
Configure Project
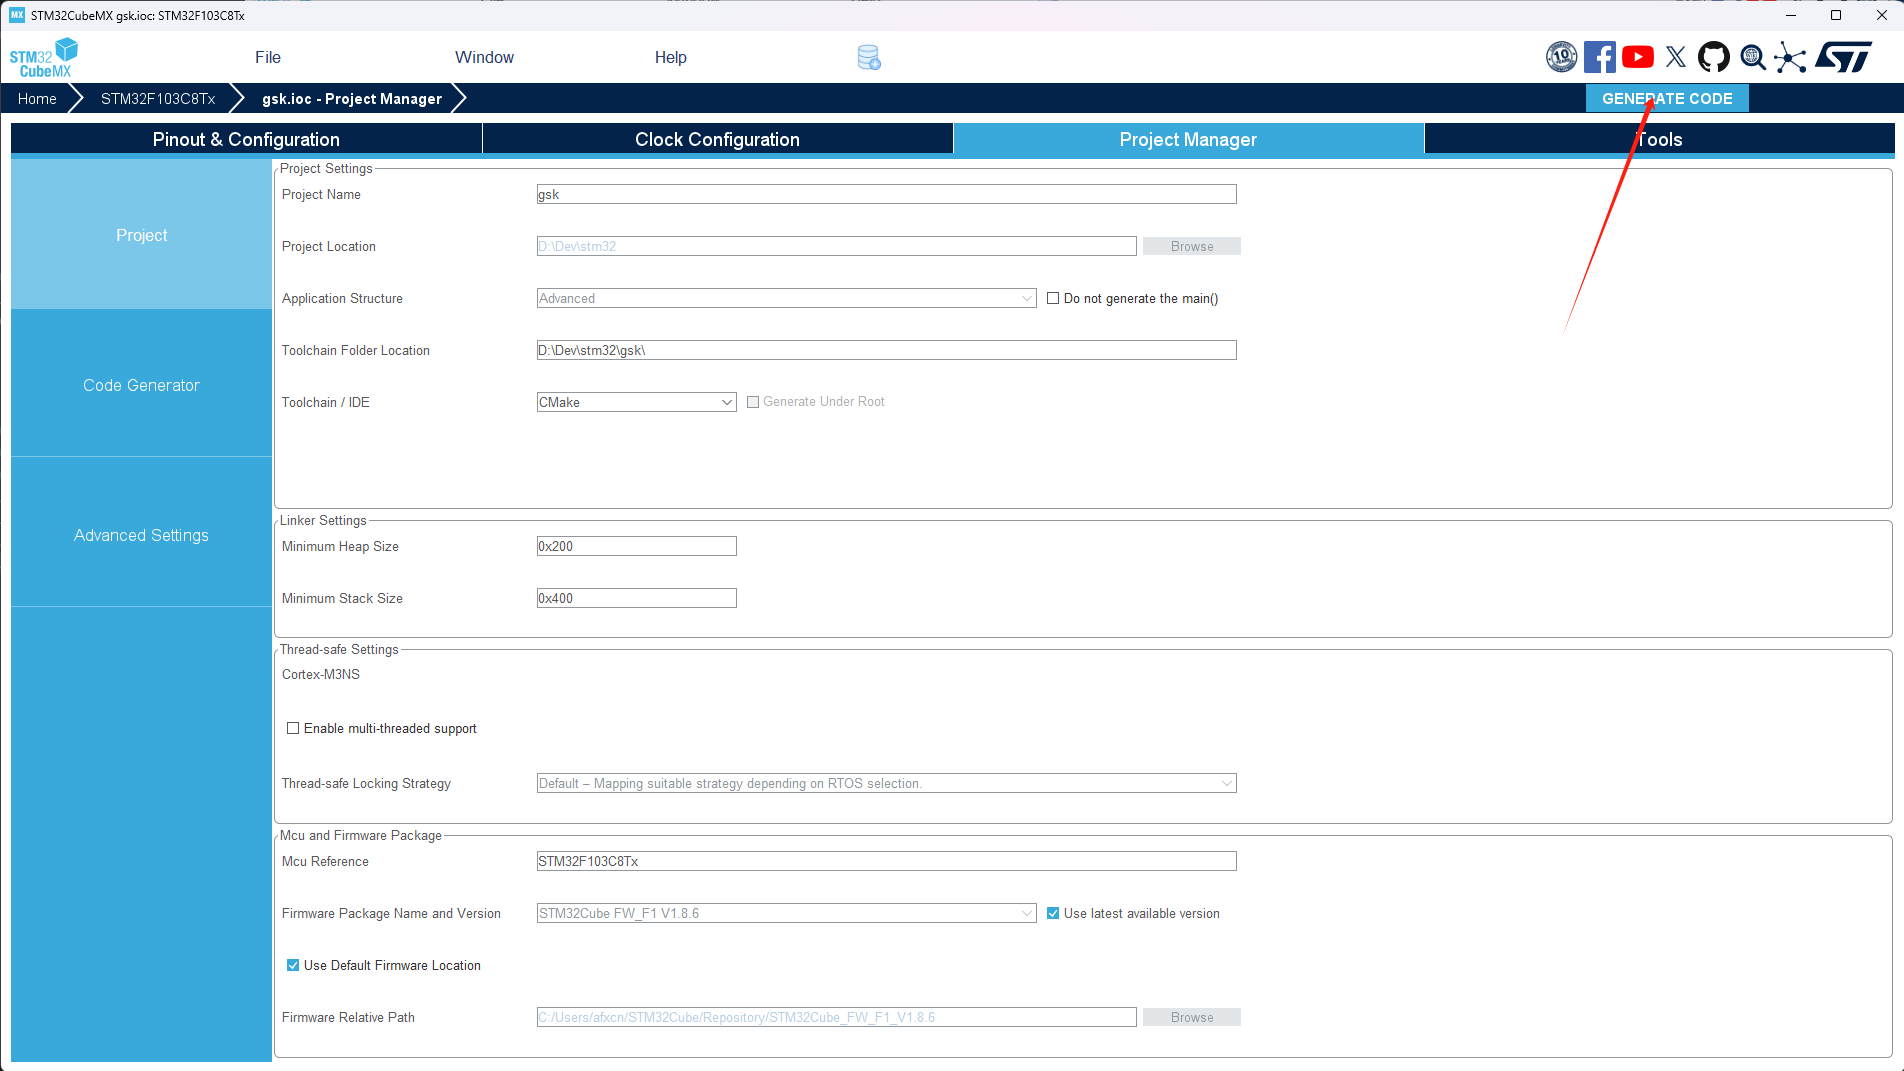
Generate Code
Open Project in VSCode
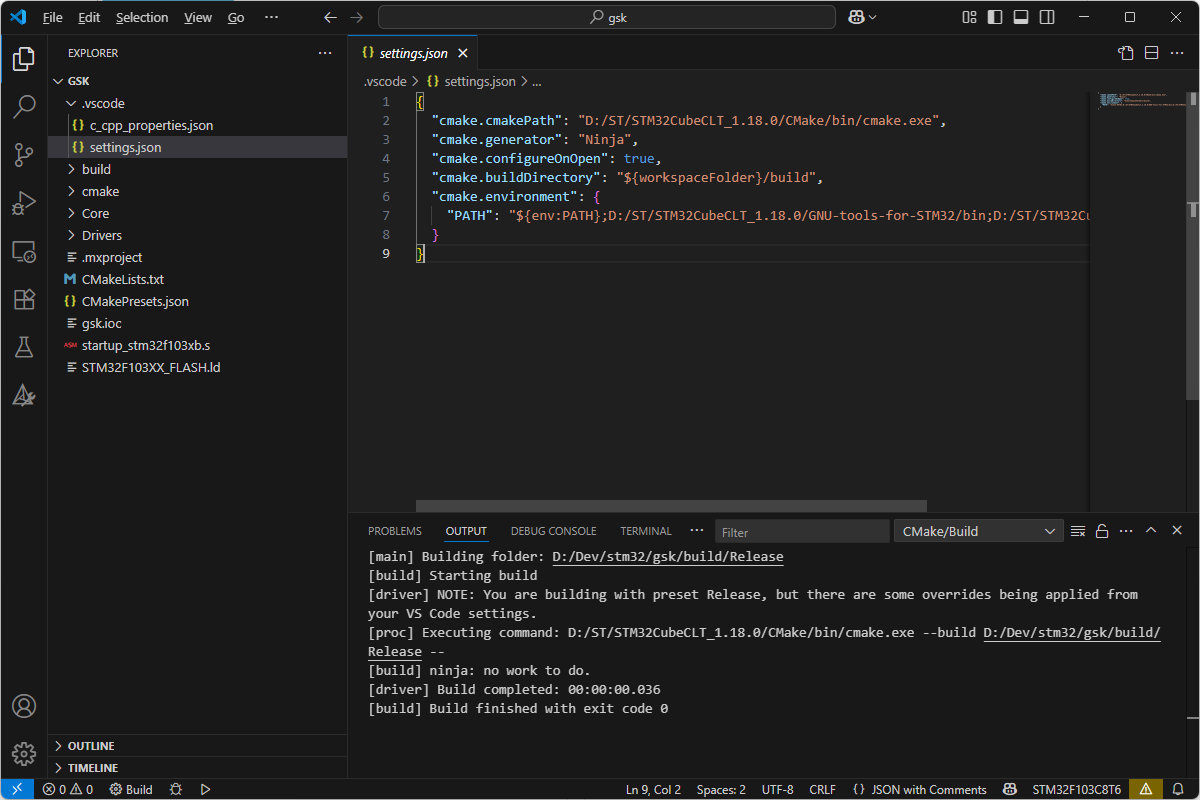
Create .vscode/settings.json File
Modify the paths according to your setup.
{
  "cmake.cmakePath": "D:/ST/STM32CubeCLT_1.18.0/CMake/bin/cmake.exe",
  "cmake.generator": "Ninja",
  "cmake.configureOnOpen": true,
  "cmake.buildDirectory": "${workspaceFolder}/build",
  "cmake.environment": {
    "PATH": "${env:PATH};D:/ST/STM32CubeCLT_1.18.0/GNU-tools-for-STM32/bin;D:/ST/STM32CubeCLT_1.18.0/Ninja/bin;"
  }
}

### Create .vscode/c_cpp_properties.json File

Modify the paths according to your setup.

```json title=".vscode/c_cpp_properties.json"
{
  "configurations": [
    {
      "name": "STM32F103C8T6",
      "includePath": [
        "${workspaceFolder}/**",
        "${workspaceFolder}/Core/Inc",
        "${workspaceFolder}/Drivers/STM32F1xx_HAL_Driver/Inc",
        "${workspaceFolder}/Drivers/CMSIS/Device/ST/STM32F1xx/Include",
        "${workspaceFolder}/Drivers/CMSIS/Include"
      ],
      "defines": [
        "STM32F103xB",
        "USE_HAL_DRIVER"
      ],
      "compilerPath": "D:/ST/STM32CubeCLT_1.18.0/GNU-tools-for-STM32/bin/arm-none-eabi-gcc.exe",
      "cStandard": "c11",
      "cppStandard": "c++17",
      "intelliSenseMode": "gcc-arm"
    }
  ],
  "version": 4
}
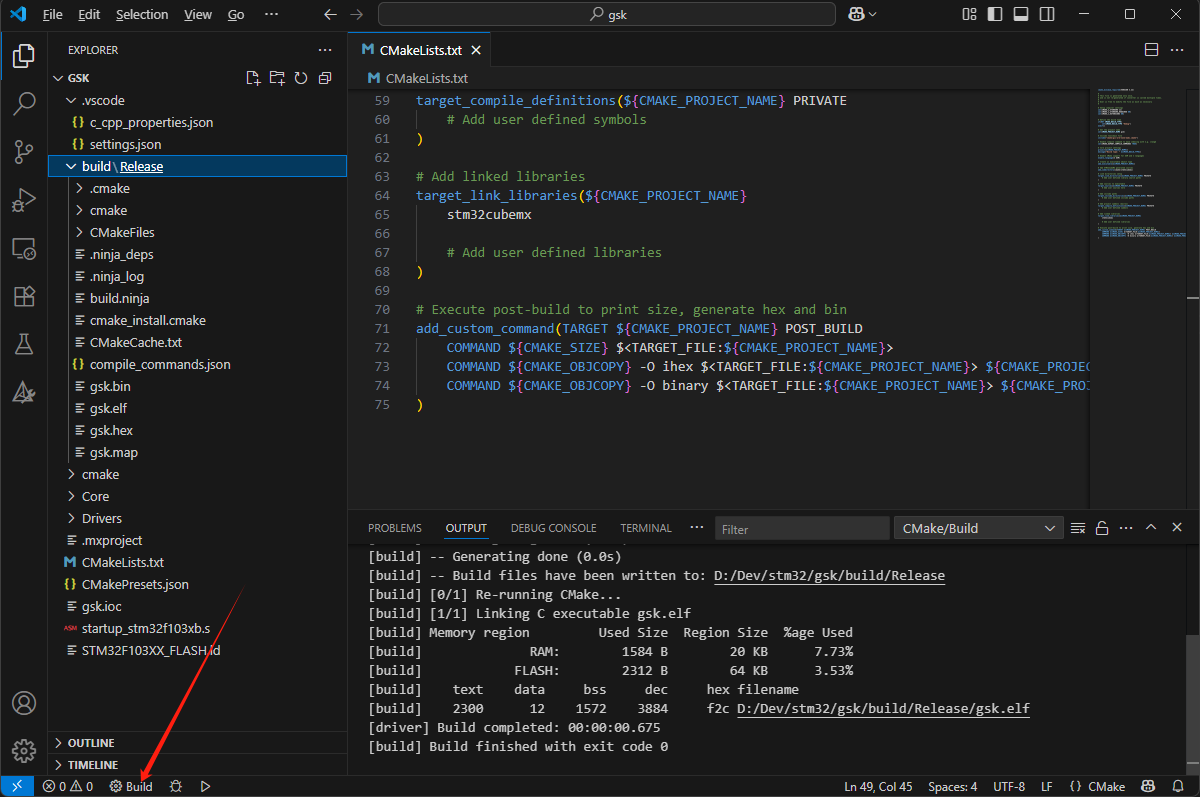
Edit CMakeLists.txt File
Add the following content at the end of the file:
# Execute post-build to print size, generate hex and bin
add_custom_command(TARGET ${CMAKE_PROJECT_NAME} POST_BUILD
    COMMAND ${CMAKE_SIZE} $<TARGET_FILE:${CMAKE_PROJECT_NAME}>
    COMMAND ${CMAKE_OBJCOPY} -O ihex $<TARGET_FILE:${CMAKE_PROJECT_NAME}> ${CMAKE_PROJECT_NAME}.hex
    COMMAND ${CMAKE_OBJCOPY} -O binary $<TARGET_FILE:${CMAKE_PROJECT_NAME}> ${CMAKE_PROJECT_NAME}.bin
)
Compile Project
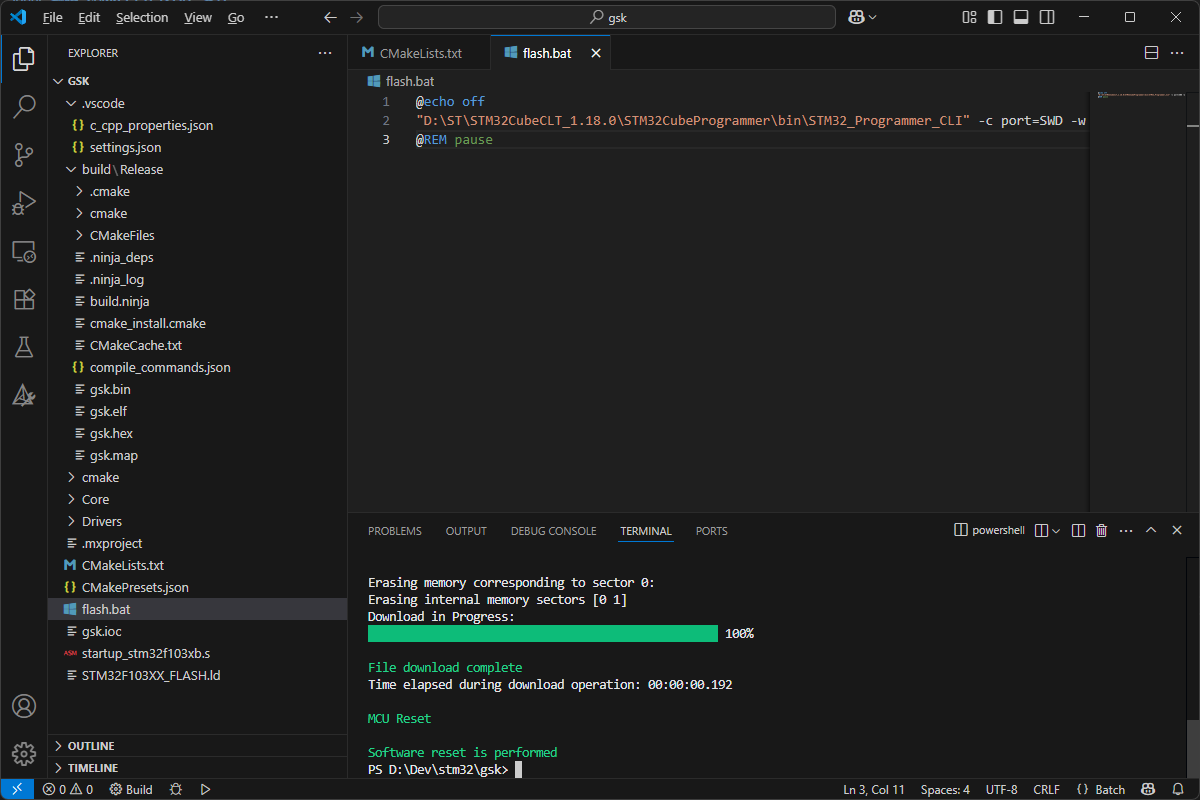
Create flash.bat File
Modify the paths according to your setup.
@echo off
"D:\ST\STM32CubeCLT_1.18.0\STM32CubeProgrammer\bin\STM32_Programmer_CLI" -c port=SWD -w "build\release\gsk.hex" -rst
@REM pause
Connect ST-Link to the Development Board
- CLK -> CLK
- DIO -> DIO
- GND -> GND
- 3V3 -> 3V3
Download Program
Run flash.bat to download the program.
Conclusion
This article has shown you how to set up the STM32 development environment and demonstrated how to compile and download a program. We hope you can successfully get started with STM32 programming through this guide and continue to learn and practice in real projects.
Copyright Notice: Free to Share - Non-commercial - No Derivatives - Keep Author - Keep Source
Author: afxcn
Source: https://gostartkit.com/docs/stm32/getting-started
Date: June 17, 2025